> ## Documentation Index
> Fetch the complete documentation index at: https://docs.roomdoo.com/llms.txt
> Use this file to discover all available pages before exploring further.

# How to create invoices for a customer

> Learn how to create invoices for a customer in Roomdoo after check-out, including advance invoices, in just a few clicks.

Here's how to issue an invoice in Roomdoo:

<iframe width="100%" height="400" src="https://www.youtube.com/embed/ag6Gh6GPt50" title="Introducción a Roomdoo" frameBorder="0" allow="accelerometer; autoplay; clipboard-write; encrypted-media; gyroscope; picture-in-picture" allowFullScreen />

If the check-out date has passed, the customer has paid, and no proforma has been issued yet, here's how to create the invoice in Roomdoo:

1. Open the reservation from the calendar or by reservation number.
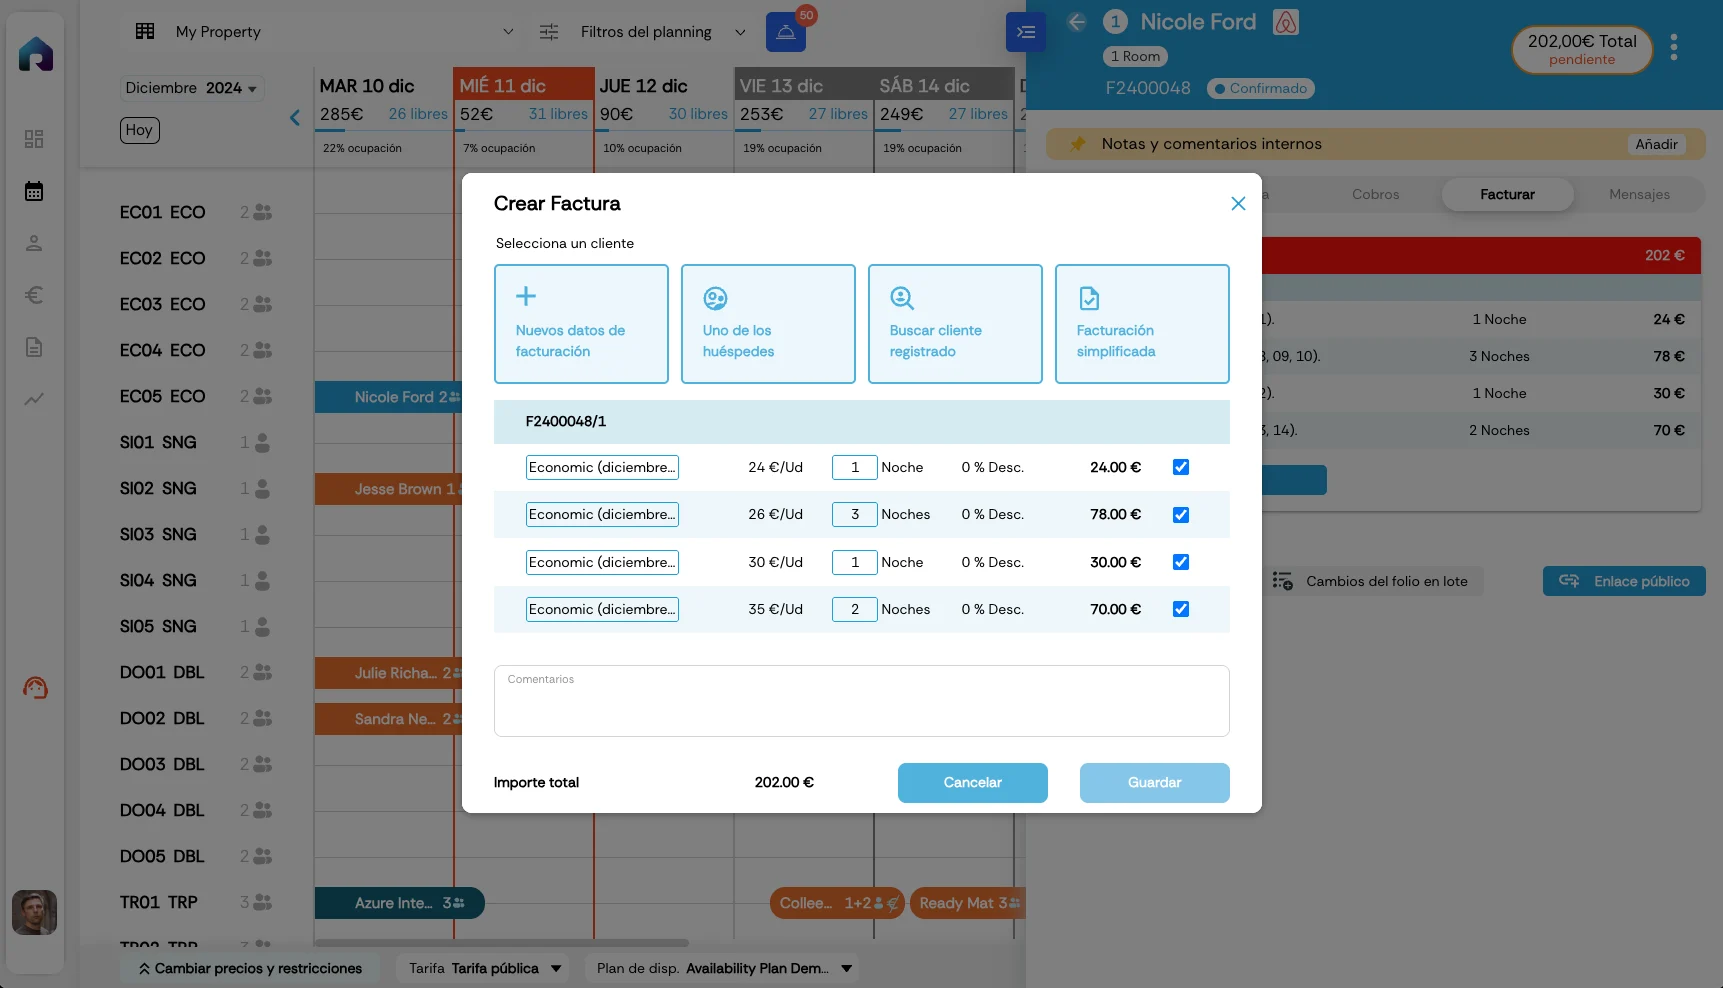
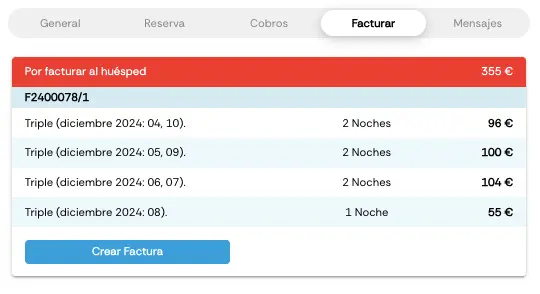
2. Click the **Invoicing** tab → **Create invoice**.

<div style={{display: "flex", justifyContent: "center"  }}>
  <img src="https://mintcdn.com/roomdoo/xVfNzwKJoYNduOOs/images/facturacion/crear-factura.webp?fit=max&auto=format&n=xVfNzwKJoYNduOOs&q=85&s=9c0ee9d76dadbb2d4c686b8b7f02d43f" alt="Create invoice" style={{ maxWidth: "600px", width: "100%" }} width="540" height="294" data-path="images/facturacion/crear-factura.webp" />
</div>

<div style={{display: "flex", justifyContent: "center"  }}>
  <img src="https://mintcdn.com/roomdoo/xVfNzwKJoYNduOOs/images/facturacion/Captura%20de%20pantalla%202024-12-11%20a%20las%2013.50.09.png?fit=max&auto=format&n=xVfNzwKJoYNduOOs&q=85&s=794608ae8ee74b78724b8ae988db3075" alt="Invoice details" style={{ maxWidth: "600px", width: "100%" }} width="1723" height="988" data-path="images/facturacion/Captura de pantalla 2024-12-11 a las 13.50.09.png" />
</div>

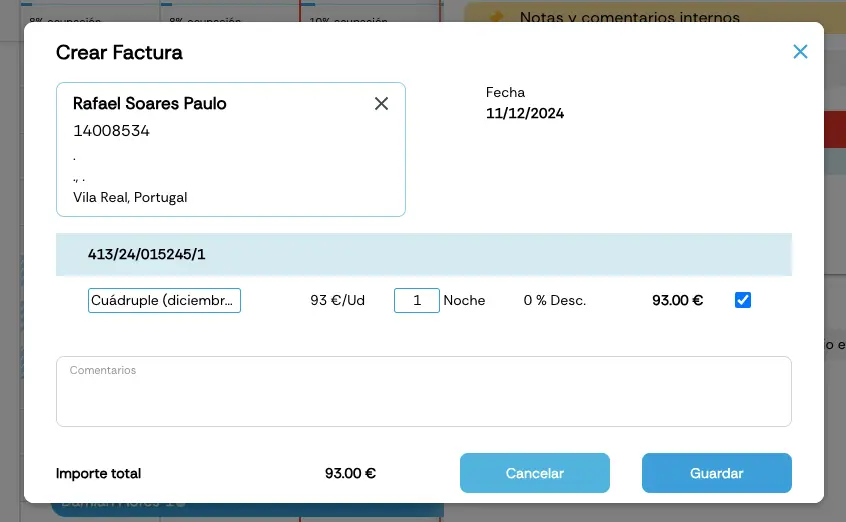
3. If the customer is already on file, type their ID number and they appear automatically. If they're not on file or the invoice is in someone else's name, click **Customer** and fill in the fields.
4. From here you can adjust several things:
   * Choose which products to remove from the invoice — those stay pending to be invoiced later.
   * In the comments box, add anything extra needed on the invoice.

<div style={{display: "flex", justifyContent: "center"  }}>
  <img src="https://mintcdn.com/roomdoo/xVfNzwKJoYNduOOs/images/facturacion/facturacion.webp?fit=max&auto=format&n=xVfNzwKJoYNduOOs&q=85&s=3624bfcf71f9a3c8c39c941a3b3b2a4e" alt="Invoice form" style={{ maxWidth: "600px", width: "100%" }} width="846" height="522" data-path="images/facturacion/facturacion.webp" />
</div>

5. Click **Save** and the proforma invoice is issued.
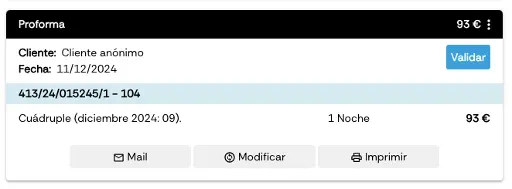
6. Once the proforma is created, the **Invoicing** tab shows the proforma in a black box. At the top, a red box shows what's still pending to be invoiced.

<div style={{display: "flex", justifyContent: "center"  }}>
  <img src="https://mintcdn.com/roomdoo/xVfNzwKJoYNduOOs/images/facturacion/proforma.webp?fit=max&auto=format&n=xVfNzwKJoYNduOOs&q=85&s=6065985a482742babef63bb6c1778e72" alt="Proforma view" style={{ maxWidth: "600px", width: "100%" }} width="512" height="189" data-path="images/facturacion/proforma.webp" />
</div>

7. While the invoice is still a proforma, Roomdoo lets you modify it, email it, and print it.

<Note>
  Once the invoice is issued, you **can still make certain changes** from Roomdoo using the **Modify** button on the invoice itself: change the invoiced contact, remove lines or adjust line items. When you save, the system automatically generates a **corrective**: the credit-note invoice is recorded in Odoo and the new final invoice (with a different sequence number) is the one that stays visible in Roomdoo and gets delivered to the customer.

  Some changes **do require support** — for example, changing the room-night amount when the invoice was issued at the wrong price. For those cases, get in touch with our team. See [Modify invoice details](/en/invoicing/modify-invoice-details) and [Correct an invoice](/en/invoicing/correct-invoice).
</Note>

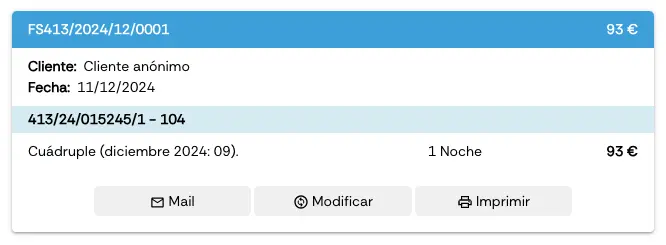
8. When the check-out day arrives, opening the **Invoicing** tab shows a **Validate** button on the proforma's black box. Clicking it turns the box blue, with an invoice number attached.

<div style={{display: "flex", justifyContent: "center"  }}>
  <img src="https://mintcdn.com/roomdoo/xVfNzwKJoYNduOOs/images/facturacion/factura-validada.webp?fit=max&auto=format&n=xVfNzwKJoYNduOOs&q=85&s=6f7b67387d28d3fa2c32e2e03e10a0d9" alt="Validated invoice" style={{ maxWidth: "600px", width: "100%" }} width="666" height="245" data-path="images/facturacion/factura-validada.webp" />
</div>

<Warning>
  The automatic validation between 22:00 and 23:00 on the check-out day **only applies if your property has auto-invoicing configured**, which is the minority of cases. Otherwise, leaving a proforma unvalidated manually can cause issues in the invoicing chronology from the next day onwards. **Always validate the proforma manually** when applicable.
</Warning>

## Advance invoices

Although not generally recommended, Roomdoo can also issue **advance invoices** — those issued before the check-out date.

To create an advance invoice in Roomdoo, the reservation must be paid first. Then:

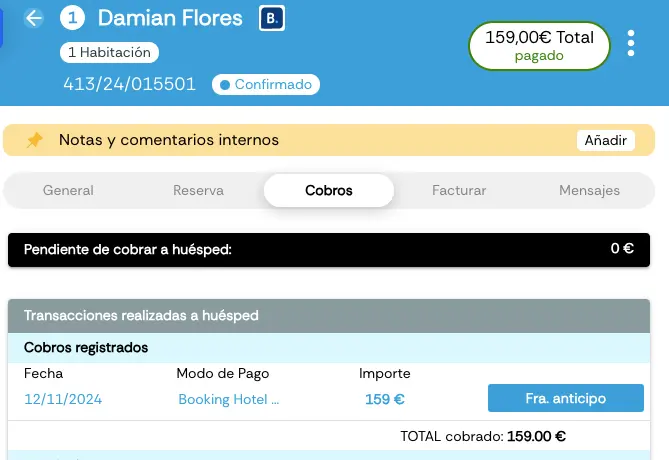
* From the **Payments** tab, click the **Advance invoice** button.

<div style={{display: "flex", justifyContent: "center"  }}>
  <img src="https://mintcdn.com/roomdoo/xVfNzwKJoYNduOOs/images/facturacion/factura-anticipo.webp?fit=max&auto=format&n=xVfNzwKJoYNduOOs&q=85&s=49b4770b65ba73f3430a7cb50d9ca349" alt="Advance invoice button" style={{ maxWidth: "600px", width: "100%" }} width="669" height="460" data-path="images/facturacion/factura-anticipo.webp" />
</div>

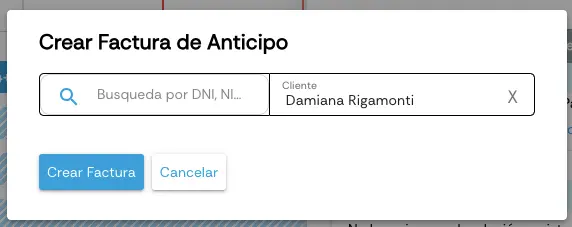
* A panel opens to enter the recipient's details. Then click **Create invoice**.

<div style={{display: "flex", justifyContent: "center"  }}>
  <img src="https://mintcdn.com/roomdoo/xVfNzwKJoYNduOOs/images/facturacion/anticipo.webp?fit=max&auto=format&n=xVfNzwKJoYNduOOs&q=85&s=c3843b40ec8eb612fb8fc73b6382c451" alt="Advance invoice form" style={{ maxWidth: "600px", width: "100%" }} width="572" height="227" data-path="images/facturacion/anticipo.webp" />
</div>

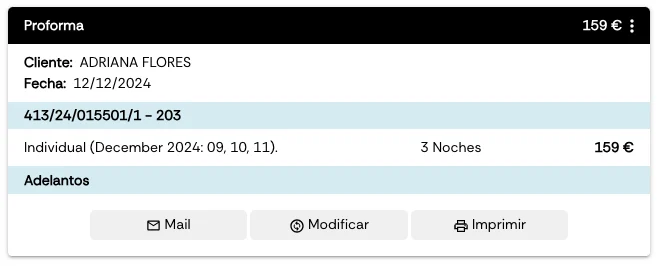
* From the reservation's **Invoicing** tab, click **Create invoice** and follow the normal proforma flow.
* The proforma will show with the concept *advance payments*.

<div style={{display: "flex", justifyContent: "center"  }}>
  <img src="https://mintcdn.com/roomdoo/xVfNzwKJoYNduOOs/images/facturacion/factura-anticipada-adelantos.png?fit=max&auto=format&n=xVfNzwKJoYNduOOs&q=85&s=14dd292e14bfb16228ea6248fc0f14ed" alt="Advance proforma" style={{ maxWidth: "600px", width: "100%" }} width="661" height="266" data-path="images/facturacion/factura-anticipada-adelantos.png" />
</div>

<Info>
  You might also be interested in our guide on [how to record a payment in Roomdoo](/en/payments/record-payment).
</Info>